Albums: WA7DUH And WB7CNV Tower Construction

WA7DUH And WB7CNV Tower Construction

Photo essay of tower project at the station of Linda WB7CNV and Steve WA7DUH. They live just outside of the Richland and West Richland city limits in Benton County. Project is to initially erect a 65 ft guyed tower, but to design it for 75 ft or higher. Benton County has an ordinance controlling "communications facilities" (BCC 11.65) which includes "communication towers and antennas." Many of the requirements are exempted for amateur radio towers and antennas not exceeding 65 ft.
138 images Submitted by WA7DUH Steve St... on Sat, 08/04/2012 - 11:19am

P1020855a.jpg

0 / 0
Uploaded on 10/10/2012 - 5:40pm by WA7DUH Steve St... 539 visits

P1020869a.jpg

0 / 0
Uploaded on 10/10/2012 - 5:38pm by WA7DUH Steve St... 520 visits

P1020868a.jpg

0 / 0
Uploaded on 10/10/2012 - 5:38pm by WA7DUH Steve St... 537 visits

P1020859a.jpg

0 / 0
Uploaded on 10/10/2012 - 5:38pm by WA7DUH Steve St... 563 visits

P1020856a.jpg

0 / 0
Uploaded on 10/10/2012 - 5:37pm by WA7DUH Steve St... 516 visits

P1020790.JPG

0 / 0
Uploaded on 09/25/2012 - 11:04am by WA7DUH Steve St... 487 visits

P1020786.JPG

0 / 0
Uploaded on 09/25/2012 - 11:04am by WA7DUH Steve St... 719 visits

P1020785.JPG

Yes, the droop is normal. Note the middle driven element has not been installed in this picture. The tree has to be removed.

0 / 0
Uploaded on 09/25/2012 - 11:04am by WA7DUH Steve St... 743 visits

P1020784.JPG

A completed element. 30M & 40M beam operation is achieved by pushing the beryllium tape through the sweep and down the "return" side, creating a resonant folded element. Thus these elements are only 40 feet wide instead of the 62 feet that would be required if they where straight out.

0 / 0
Uploaded on 09/25/2012 - 11:04am by WA7DUH Steve St... 698 visits

P1020783.JPG

Rubber boots hold the elements into the EHU sockets.

0 / 0
Uploaded on 09/25/2012 - 11:04am by WA7DUH Steve St... 685 visits

P1020781.JPG

0 / 0
Uploaded on 09/25/2012 - 11:04am by WA7DUH Steve St... 609 visits

P1020779.JPG

0 / 0
Uploaded on 09/25/2012 - 11:03am by WA7DUH Steve St... 550 visits

P1020778.JPG

0 / 0
Uploaded on 09/25/2012 - 11:03am by WA7DUH Steve St... 587 visits

P1020777.JPG

0 / 0
Uploaded on 09/25/2012 - 11:03am by WA7DUH Steve St... 782 visits

P1020776.JPG

Assembling an inner guide and support tube that is slid into the large end of the element tubes to provide a consistent diameter for the beryllium tape that must slide in and out.

0 / 0
Uploaded on 09/25/2012 - 11:03am by WA7DUH Steve St... 712 visits

P1020773.JPG

0 / 0
Uploaded on 09/25/2012 - 11:03am by WA7DUH Steve St... 562 visits

P1020772.JPG

0 / 0
Uploaded on 09/25/2012 - 11:03am by WA7DUH Steve St... 554 visits

P1020771.JPG

0 / 0
Uploaded on 09/25/2012 - 11:03am by WA7DUH Steve St... 465 visits

P1020769.JPG

0 / 0
Uploaded on 09/25/2012 - 11:03am by WA7DUH Steve St... 559 visits

P1020767.JPG

After assembling 1 of the active elements on the grass by the tower in about 3 hours, assembly was moved into Steve & Linda's shop where an assembly line could be set up, as there are 6 of these to make. Time was reduced to about 1 hour per unit.

0 / 0
Uploaded on 09/25/2012 - 11:02am by WA7DUH Steve St... 631 visits

P1020761.JPG

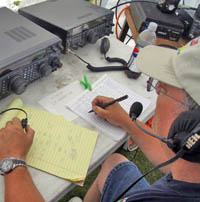
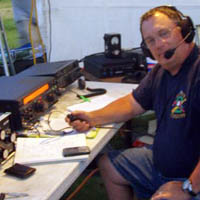
There is a lot of electronics and relays that go into this antenna. Pictured is Gary W7TYQ that came up to help from Yreka CA.

0 / 0
Uploaded on 09/25/2012 - 11:02am by WA7DUH Steve St... 503 visits

P1020759.JPG

Control lines from each active element and the coax switching relays come together into junction terminals.

0 / 0
Uploaded on 09/25/2012 - 11:02am by WA7DUH Steve St... 513 visits

P1020758.JPG

0 / 0
Uploaded on 09/25/2012 - 11:02am by WA7DUH Steve St... 566 visits

P1020757.JPG

0 / 0
Uploaded on 09/25/2012 - 11:02am by WA7DUH Steve St... 555 visits

P1020755.JPG

0 / 0
Uploaded on 09/25/2012 - 11:02am by WA7DUH Steve St... 720 visits

P1020754.JPG

A very thick polifin heat shrink tube locks each joint into place.

0 / 0
Uploaded on 09/25/2012 - 11:02am by WA7DUH Steve St... 539 visits

P1020752.JPG

Although not called for in the assembly manual, on recommendation from Brian W7BJN, a glue bead is placed at each nesting tube junction to prevent them from sliding back in over time. Constant movement in the wind at the top of a tower can cause them to work in according to Brian. Made sense to this crew.

0 / 0
Uploaded on 09/25/2012 - 11:01am by WA7DUH Steve St... 591 visits

P1020751.JPG

Dave W7DJE helps measure out an element tube. These nesting tubes are pulled out, and the ends are trimmed to length with a hacksaw.

0 / 0
Uploaded on 09/25/2012 - 11:01am by WA7DUH Steve St... 474 visits

P1020745.JPG

OK, how to these hollow fiberglass tubes go together??

0 / 0
Uploaded on 09/25/2012 - 11:01am by WA7DUH Steve St... 581 visits

P1020742.JPG

All the cabling prior to clean up.

0 / 0
Uploaded on 09/25/2012 - 11:01am by WA7DUH Steve St... 440 visits

P1020741.JPG

Coax switching unit. All three active elements may be driven.

0 / 0
Uploaded on 09/25/2012 - 11:01am by WA7DUH Steve St... 551 visits

P1020738.JPG

0 / 0
Uploaded on 09/25/2012 - 11:01am by WA7DUH Steve St... 658 visits

P1020737.JPG

0 / 0
Uploaded on 09/25/2012 - 11:01am by WA7DUH Steve St... 559 visits

P1020734.JPG

0 / 0
Uploaded on 09/25/2012 - 11:01am by WA7DUH Steve St... 469 visits

P1020733.JPG

Installing the driven element return fixture.

0 / 0
Uploaded on 09/25/2012 - 11:00am by WA7DUH Steve St... 548 visits

P1020731.JPG

Director element EHU and element return fixture.

0 / 0
Uploaded on 09/25/2012 - 11:00am by WA7DUH Steve St... 695 visits

P1020730.JPG

Distance between this driven element EHU and the element return fixture is critical. Houston, we have a problem. The driven element is centered on the mast, which means it will loop around the tower. This will cause great difficulty with the tower guy lines.

0 / 0
Uploaded on 09/25/2012 - 11:00am by WA7DUH Steve St... 436 visits

P1020729.JPG

Both the EHU and Element Return fixture must be leveled, then torqued to specifications.

0 / 0
Uploaded on 09/25/2012 - 11:00am by WA7DUH Steve St... 470 visits

P1020728.JPG

0 / 0
Uploaded on 09/25/2012 - 11:00am by WA7DUH Steve St... 519 visits

P1020727.JPG

The reflector EHU and element return fixture mounted on boom.

0 / 0
Uploaded on 09/25/2012 - 11:00am by WA7DUH Steve St... 508 visits

P1020725.JPG

0 / 0
Uploaded on 09/25/2012 - 11:00am by WA7DUH Steve St... 493 visits

P1020724.JPG

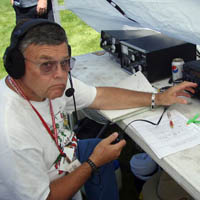
Steve WA7DUH; Peter's wife Tacy (on the end); Gary W7TYQ and Dave W7DJE trying to program a 2M handi-talkie; and Peter AC7SB.

0 / 0
Uploaded on 09/25/2012 - 11:00am by WA7DUH Steve St... 479 visits

P1020722.JPG

0 / 0
Uploaded on 09/25/2012 - 11:00am by WA7DUH Steve St... 548 visits

P1020721.JPG

0 / 0
Uploaded on 09/25/2012 - 10:59am by WA7DUH Steve St... 491 visits

P1020720.JPG

0 / 0
Uploaded on 09/25/2012 - 10:59am by WA7DUH Steve St... 495 visits

P1020719.JPG

Many parts to each unit..

0 / 0
Uploaded on 09/25/2012 - 10:59am by WA7DUH Steve St... 628 visits

P1020717.JPG

Assembling an element housing unit (EHU) prior to installation.

0 / 0
Uploaded on 09/25/2012 - 10:59am by WA7DUH Steve St... 510 visits

P1020716.JPG

The interior of a SteppIR Element Housing Unit (EHU) with stepper motor that drives copper-beryllium tapes in and out of the hollow antenna element tubes. The tapes are the radiating/active elements of the Yagi beam antenna. This SteppIR antenna is able to be resonant anywhere between 6.5 Mhz and 54 Mhz by adjusting the lengths of the Beryllium tapes. The tapes are wound on the spools that are seen in the picture using the cogged wheel that engage holes punched into the tapes. Cogged wheel is driven by a stepper motor, which has absolute positioning capability. The computerized controller knows how far to position out the tapes in the driver, reflector and director tubes for any given frequency.

0 / 0
Uploaded on 09/25/2012 - 10:59am by WA7DUH Steve St... 493 visits

P1020715.JPG

Gary (W7TYQ) Dave (W7DJE) and Peter (AC7SB) attach the reflector Return Element Support to the boom.

0 / 0
Uploaded on 09/25/2012 - 10:59am by WA7DUH Steve St... 503 visits

P1020714.JPG

Peter Rosenberg (AC7SB) from Fall City WA joins the antenna assembly team. Steve (WA7DUH), Peter and Gary (W7TYQ) apply anti-sieze compound to the staddles that will be used for one of the Return Element fixtures. Liberal use of anti-sieze compound is critical because of the many dissimilar metals used in both the antenna and hazer (aluminum, stainless steel hardware and galvanized steel.)

0 / 0
Uploaded on 09/25/2012 - 10:59am by WA7DUH Steve St... 454 visits